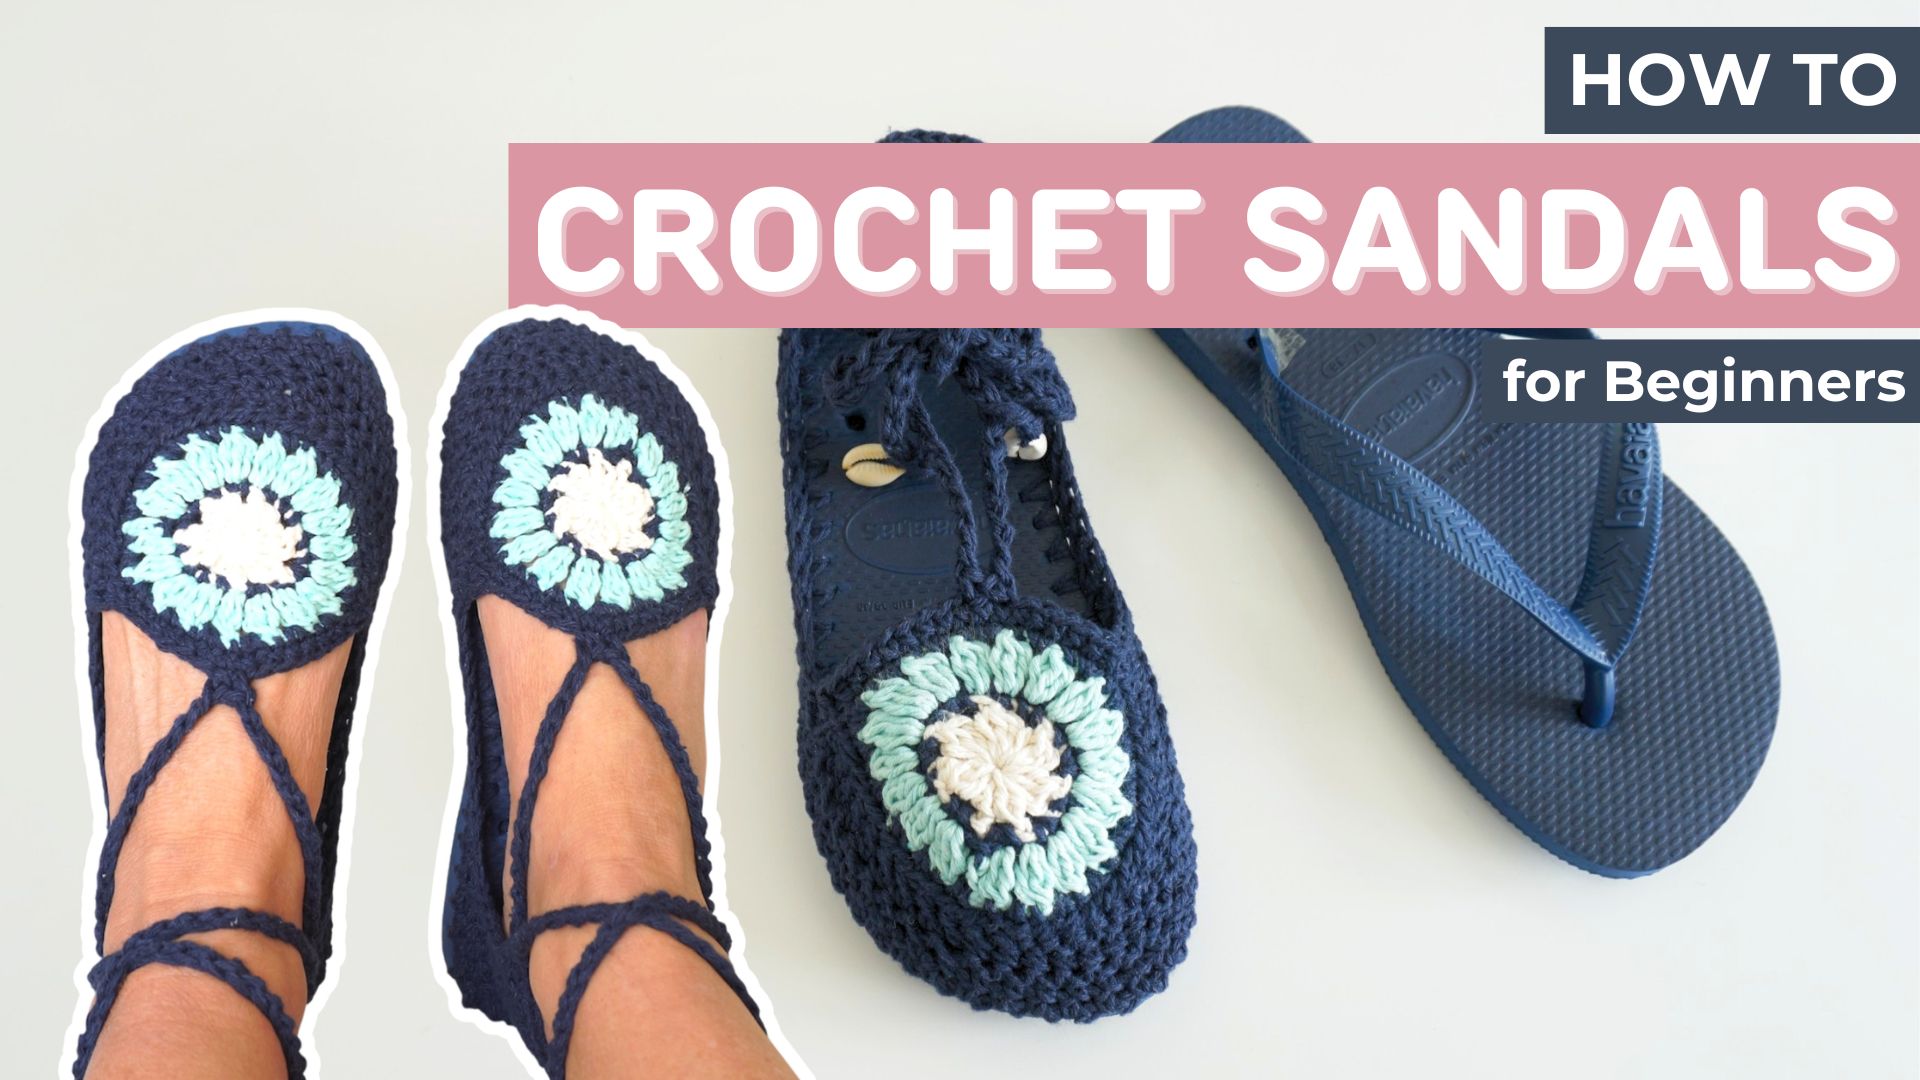
Did you know that over two billion pairs of flip-flops are sold worldwide every single year? That is a lot of rubber! Instead of wearing the same old boring footwear this beach season, I decided to transform my look completely. I am absolutely thrilled to share my ultimate secret for crafting beautiful, comfortable crochet sandals for summer using Havaianas flip-flop bases. You can easily make your own boutique-style footwear right at home! Trust me, once you learn how to make custom crochet sandals for summer using Havaianas soles, you will never want to wear plain plastic straps ever again! Let’s dive into this fun upcycling project together!
Table of Contents
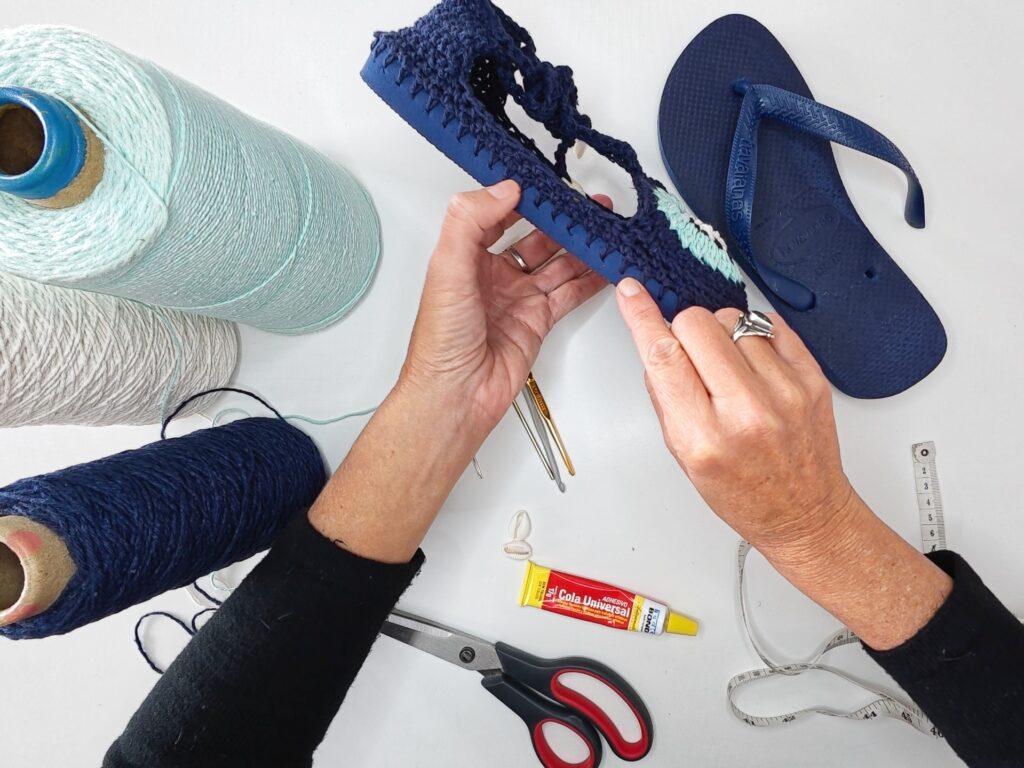
Materials Needed for This Project
Before we pick up our tools, let’s gather everything we need to make Crochet Sandals for Summer Using Havaianas Soles. Having your workspace organized makes the crafting process much smoother!
- 1 Pair of Havaianas Flip-Flops: Pick your favorite color. Make sure they fit your feet perfectly (Purchase Here)
- Yarn: Re-Up recycled cotton thread or high-quality macrame thread (Purchase Here)
- Crochet Hook: A sturdy 2.5 mm steel
- Craft Awl: A sharp metal awl or a heavy-duty leather punching tool (Purchase Here)
- Embellishments: 4 genuine cowrie shells with holes for stringing
- Scissors: A sharp pair of yarn snips or craft scissors
- Tapestry Needle: For weaving in your loose yarn ends securely
- Marking Pen: A water-soluble fabric marker to space out your holes
How to make the Crochet Sandals for Summer Using Havaianas Soles
Step 1: Preparing Your Havaianas Soles
Pro Tip: Always use a thick cutting board or a piece of scrap wood under your soles when punching holes. This protects your table from accidental damage!
First, we need to remove the original rubber straps from your Havaianas. You can simply pull them through the bottom holes or snip them off with scissors. Save the bare rubber soles. These soles are wonderful because they are thick and spongy.
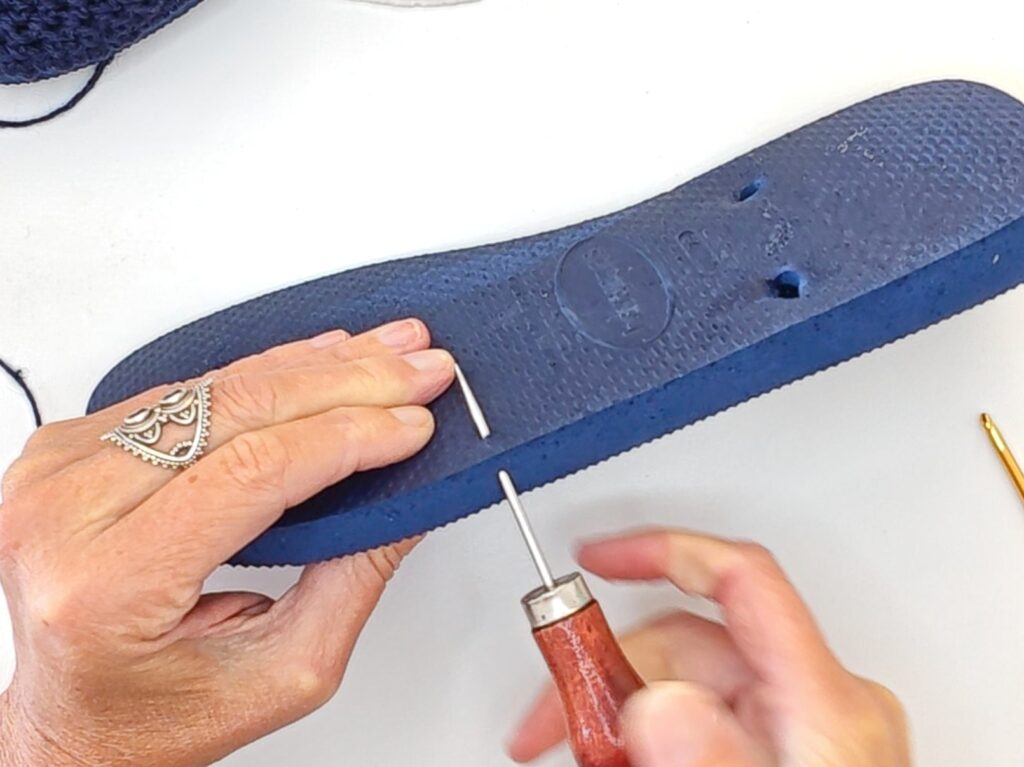
Next, take your marking pen. Draw small dots all along the top edge of the rubber sole. Space the dots about 0.5 inch or 1 cm apart from each other. Keep the dots about a quarter of an inch down from the very top edge of the sole.
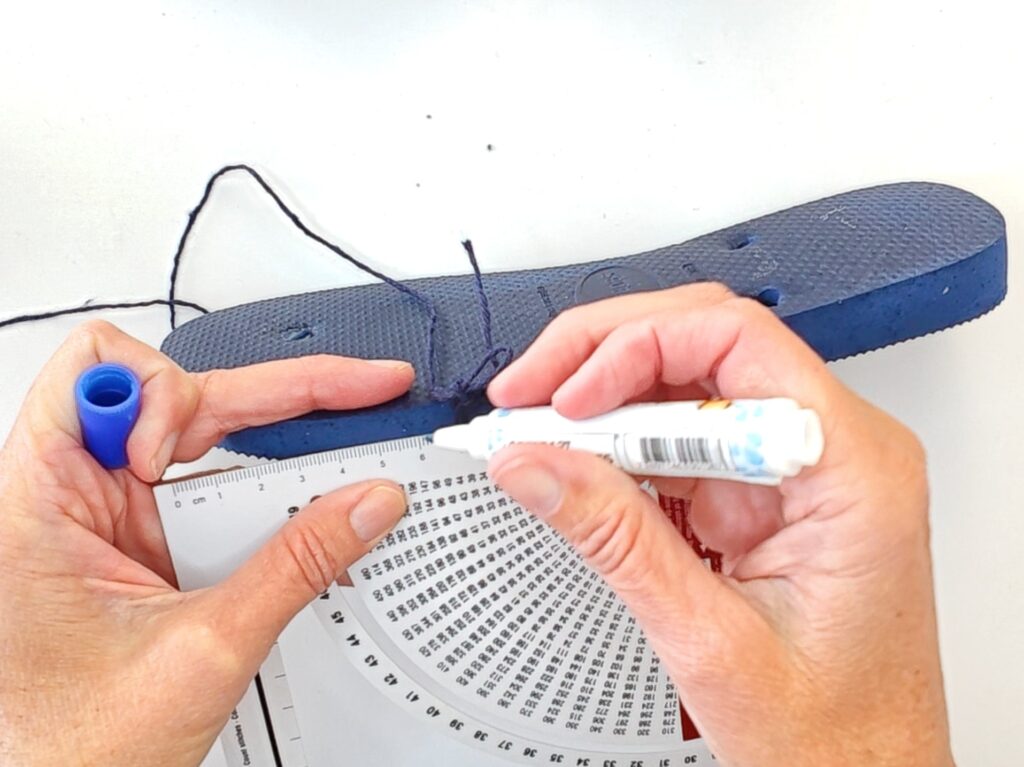
Now, grab your sharp craft awl. Push the awl firmly through each marked dot. You want to push diagonally from the side of the sole out through the top edge. Be very careful with your fingers during this step! Take your time. Once all the holes are cleanly punched, you are completely ready to start the yarn work.
Step 2: Crocheting the First Row Onto the Rubber
[Hole in Sole] -> Join Yarn -> SC -> CH 1 -> [Next Hole] -> SC -> CH 1
This is where the magic truly begins! Grab your 2.5 mm crochet hook and your chosen macrame or Re-Up thread. These specific threads are great because they do not stretch out when they get wet at the beach.
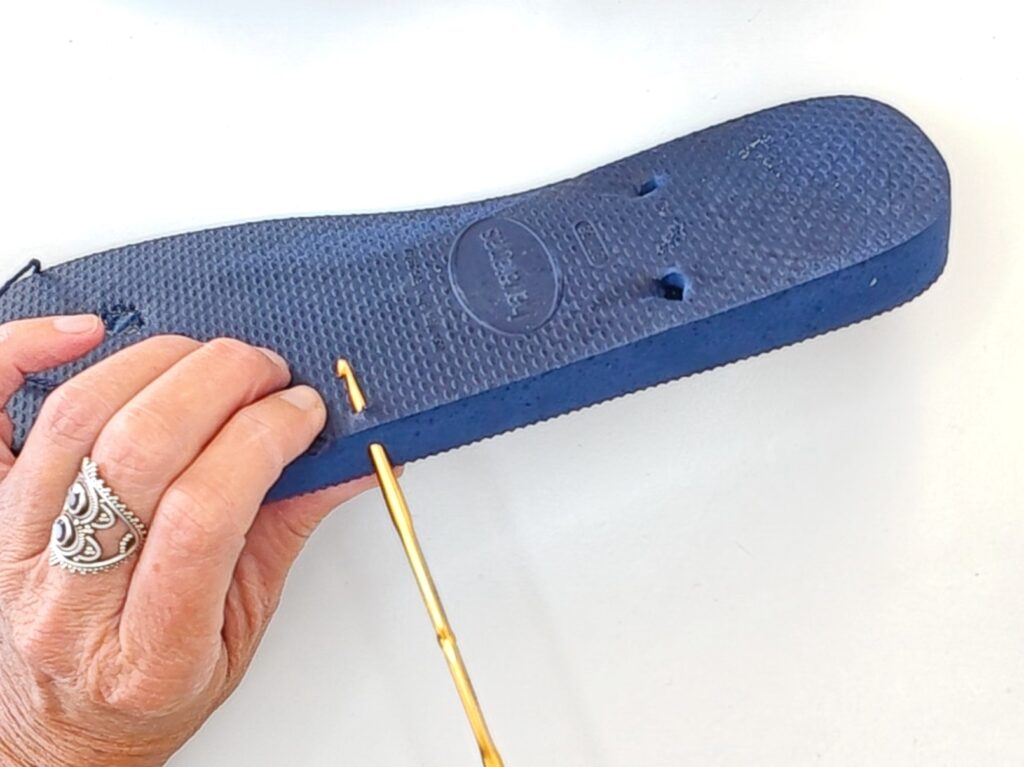
- Insert your 2.5 mm hook directly into a hole 9 cm away from the top
- Pull up a loop of your yarn
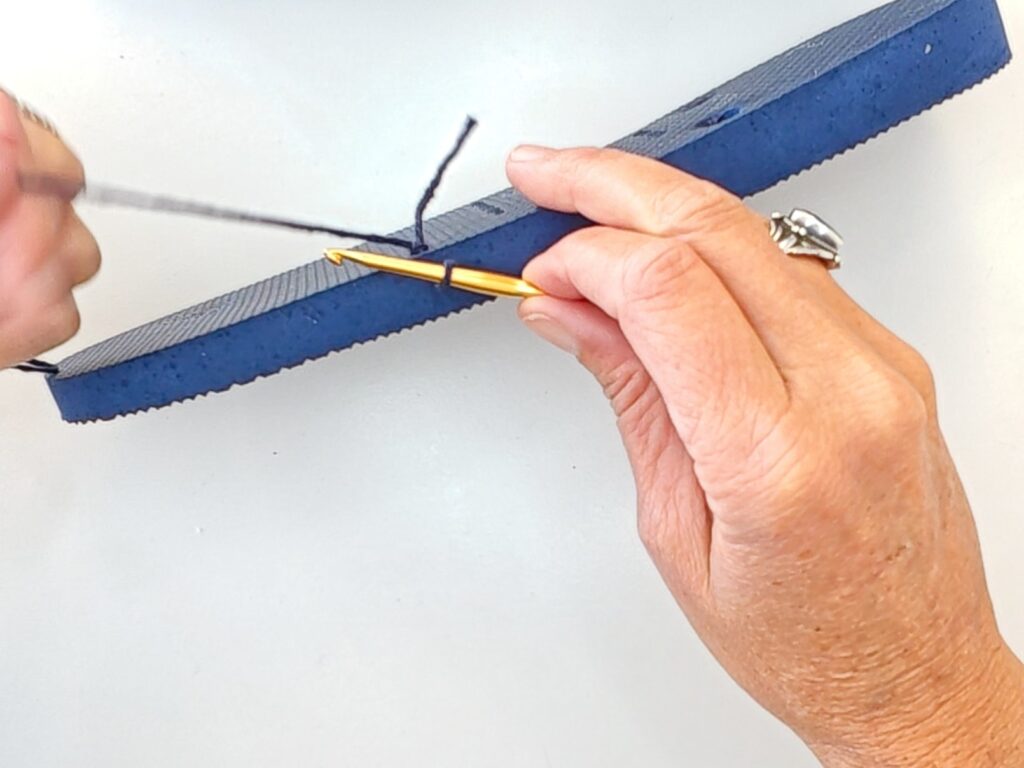
- Work 1 single crochet (SC) into that first hole
- Chain 1 (CH 1) immediately after the stitch
- Move your hook to the very next hole
- Work 1 single crochet (SC) into that hole, then CH 1
Repeat this exact pattern all the way around the entire edge of the Havaianas sole. When you reach the beginning, join with a slip stitch to your first SC.
Step 3: Crocheting the Crucial Second Row
This second row is the ultimate secret to making sure your shoes stay snugly on your feet! If you do this row incorrectly, your sandals will slip and slide around when you walk.
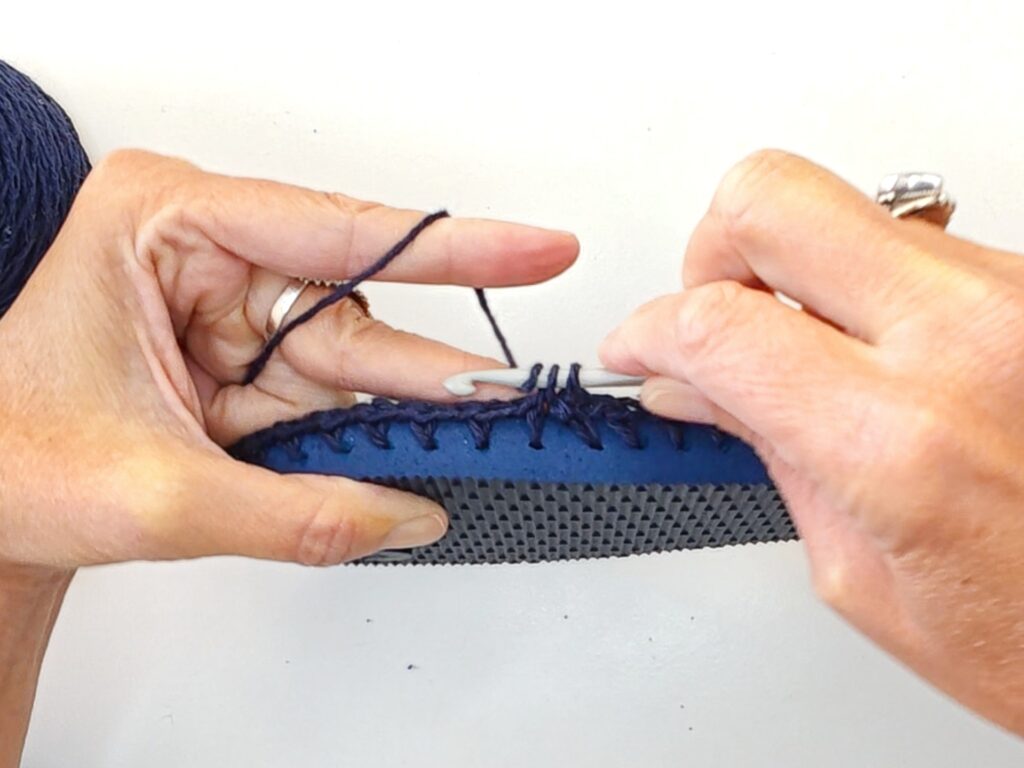
For the second row, we are going to completely skip every single single crochet stitch from the previous round. You will only work your stitches directly into the Chain 1 spaces that you created.
- Slip stitch into the first CH 1 space
- Chain 1 in the same St
- Work 1 SC into that same space
- Move directly to the next CH 1 space and work 1 SC
By skipping the single crochet stitches and only working into the chains, you naturally pull the fabric inward. This creates a beautifully tight, secure border that hugs the contour of your foot perfectly. Cut your yarn and weave in the ends safely.
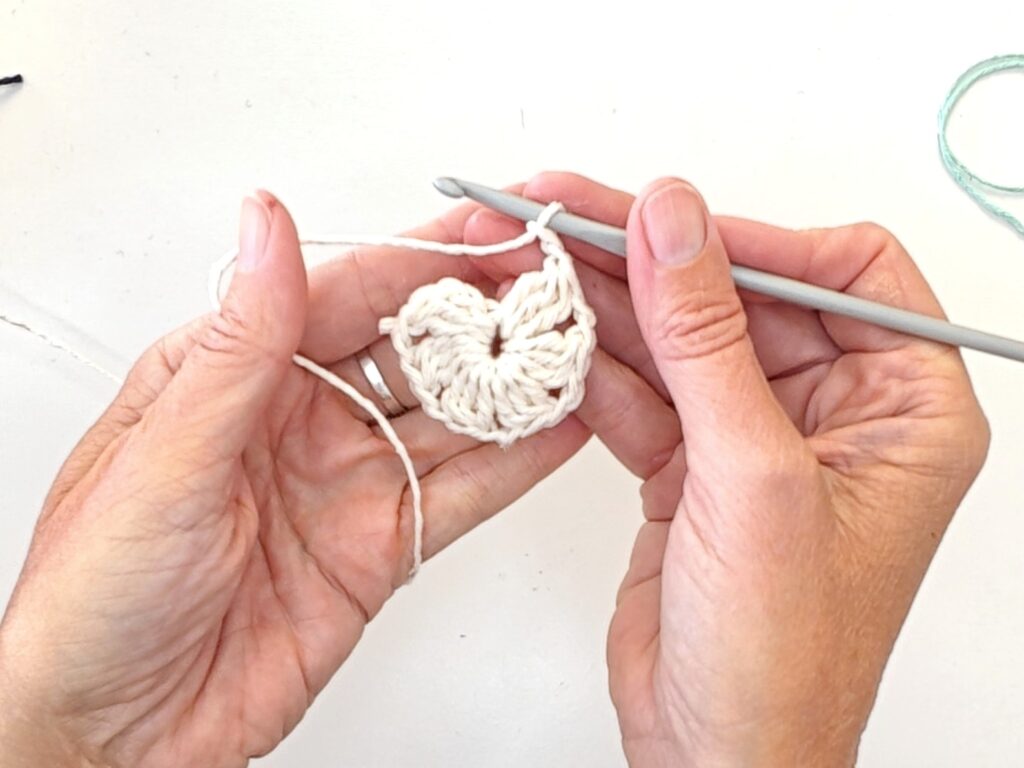
Step 4: Making the Gorgeous Round Granny Top
Now we are going to create the stunning decorative top piece for your sandal! We will make a classic round granny design that consists of exactly 4 rows.
Round 1: Make a magic ring. Work 12 clusters of (DC3Tog) with CH2 in between into the ring. Join with a Slip stitch
Round 2: SC 2 in CH space, SC 1 in DC3Tog stitch, repeat around (18 SC total)
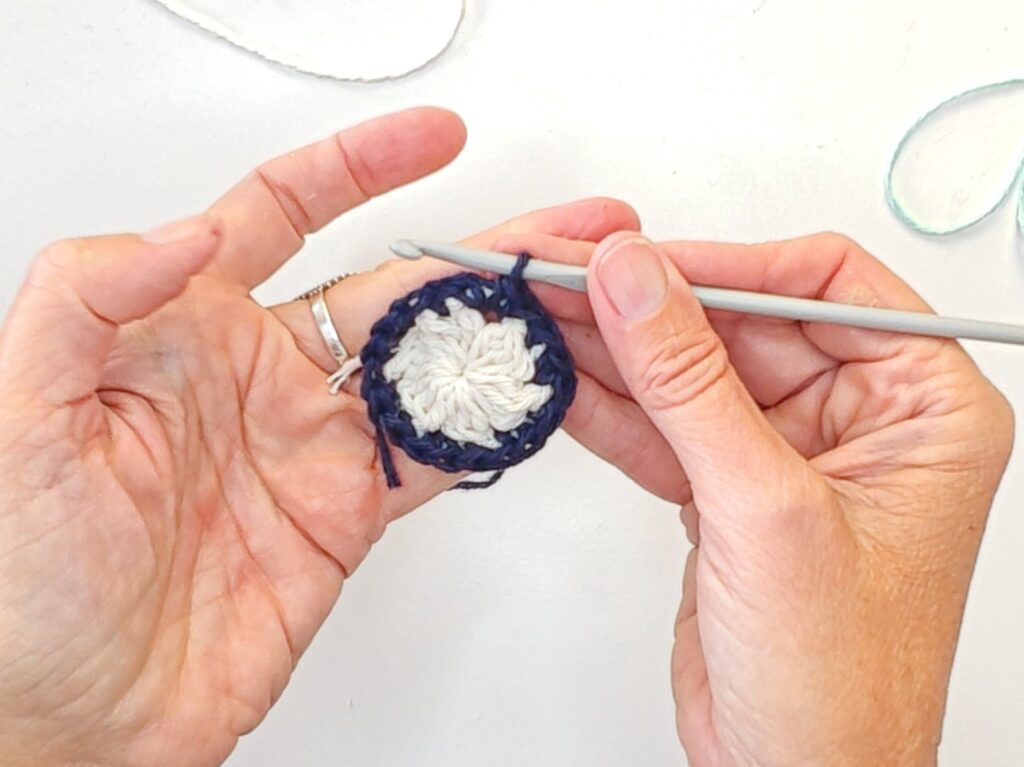
Round 3: Work 18 clusters of (DC3Tog) with CH1 in between. Join with a Slip stitch
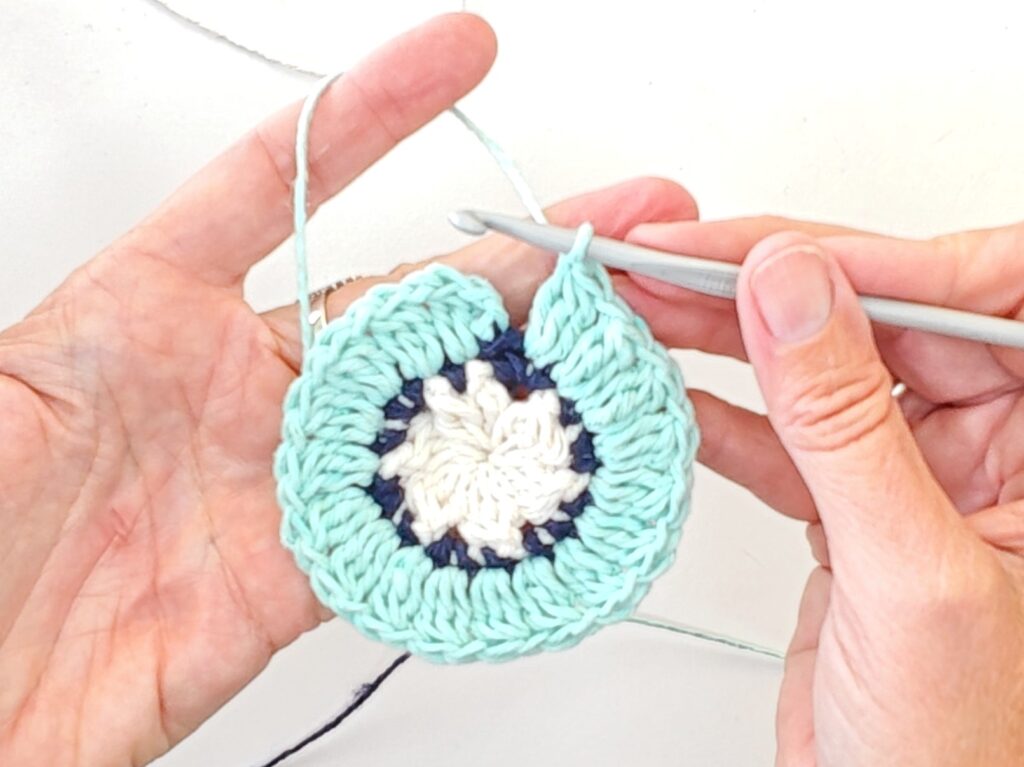
Round 4: SC 2 in CH space, SC 1 in DC3Tog stitch, repeat around
This final row gives the piece a clean, structured, and highly professional look. Repeat this step so you have two matching circles.
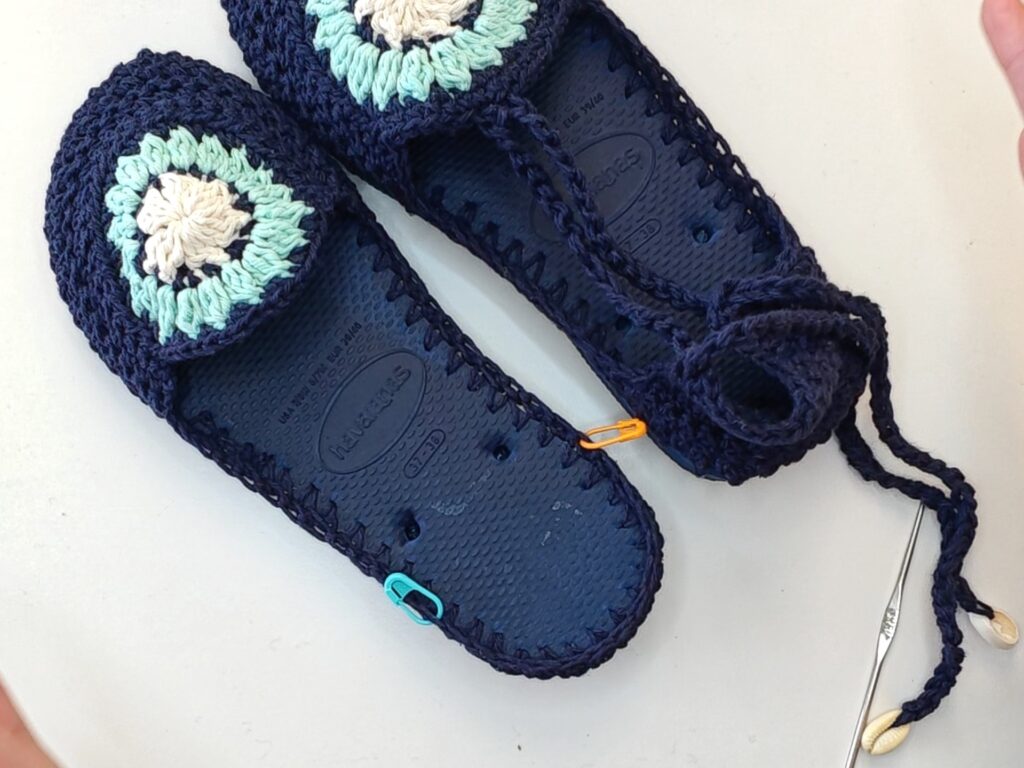
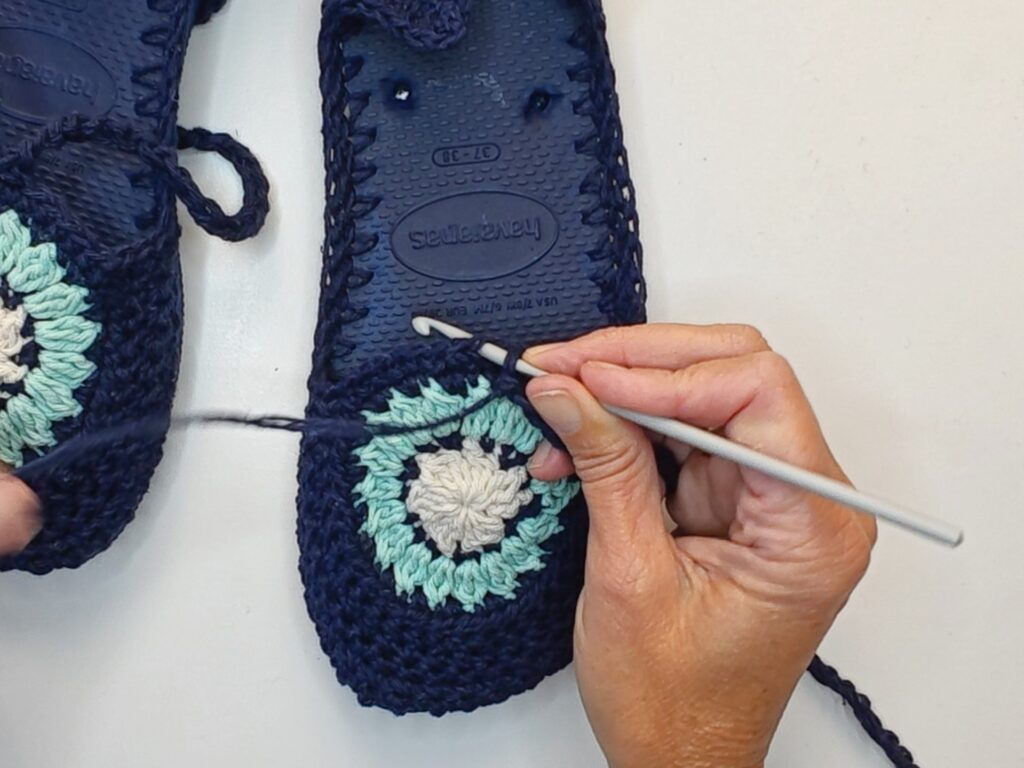
Step 5: Crafting the front
After finishing the 2nd row, start working only on the front, I like to start 9 to 10 cm for larger sizes away from the top. Use markers to define the place and make 4 rows of SC turning when you reach the marker.
Once you finish the 4 extra rows, leave a long tail to sew the granny square!
Place markers for the heels, I like them just under the strap holes! Repeat the same SC rows but make 9 rows.
Step 6: Crafting the Double Strand Straps
We want these sandals to be incredibly strong. That is why we are going to use a double strand of yarn for the straps! Hold two separate strands of your Re-Up or macrame thread together as if they were a single piece of yarn.
Attach your double strand of yarn to the outer edge of your round granny top piece. Chain a long, strong cord with 35 cm on each side. The cord needs to be long enough to wrap completely around the front of your ankle, pass beautifully through the back heel area, and tie securely.
Before you finish the ends of your straps, slide a beautiful cowrie shell onto the yarn strands! Knot the yarn tightly below the shell so it stays perfectly in place at the tip of your strap. This adds a wonderful, trendy boho-chic vibe to your summer footwear.
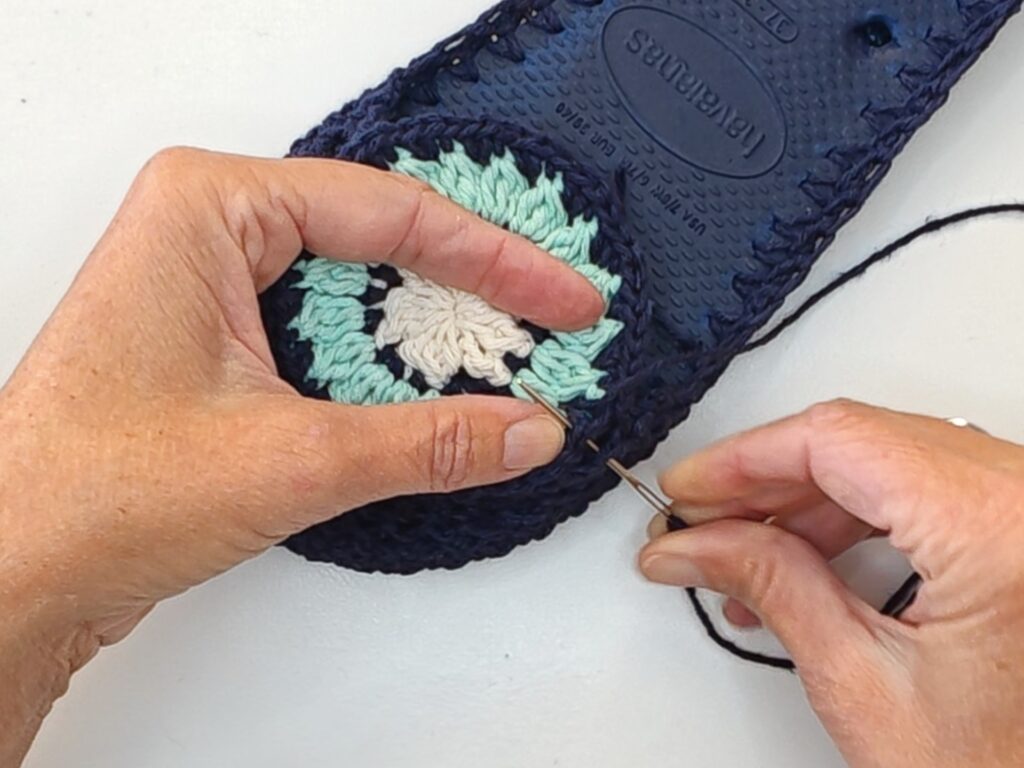
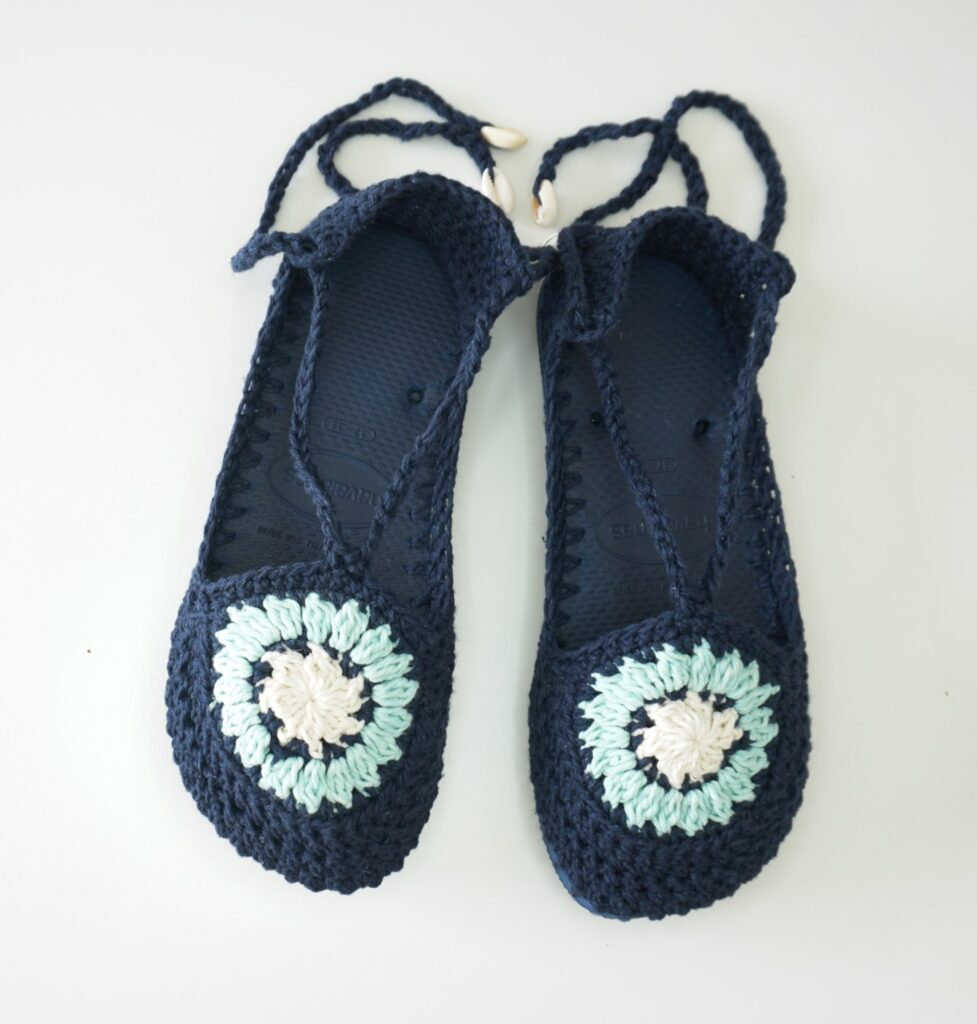
Step 7: Assembling Your Custom Sandals
Lay your completed round granny piece flat on top of your foot to check the placement. Using your tapestry needle and a single strand of yarn, sew the bottom edge of the granny circle securely to the front toe area of your crocheted sole border.
Next, guide your long double-strand straps backward toward the heel. Run the straps right through the secure crochet stitches at the back corners of the heel border. This clever design creates an adjustable harness system. When you pull the straps tight and tie them around your ankles, the entire sandal conforms beautifully to your feet!
Watch the Video on Youtube!
Frequently Asked Questions About Crochet Sandals for Summer Using Havaianas Soles
What is the best sole to use for making crochet sandals?
Havaianas are by far the absolute best soles to use for DIY crochet footwear. They are significantly thicker and much more durable than cheap dollar-store flip-flops. The dense rubber provides excellent support for your feet. It also holds the crochet stitches firmly in place without tearing or stretching out over time.
What size feet can wear this handmade crochet sandal pattern?
This specific pattern is incredibly flexible and completely customizable. You can easily adapt it to fit any shoe size ranging from a US women’s size 4 all the way up to a size 10. Because you base the stitches directly on the physical length of your chosen sole, the fit will always be absolutely perfect for your unique feet.
How do you wash handmade crochet sandals with rubber bases?
You can easily wash these handmade sandals by hand using cool water and a very mild soap or detergent. Gently scrub the fabric parts with your fingers or a very soft brush. Afterward, let them air dry completely out of direct, harsh sunlight to keep the rubber from cracking and to prevent the yarn colors from fading.
Summary and Closing Thoughts
Making your own gorgeous summer footwear is such an incredibly rewarding experience! By using thick, reliable Havaianas soles and sturdy macrame thread, you create durable shoes that look like they came straight out of a high-end beach boutique. You can mix and match yarn colors, add more shells, or adjust the strap length to match your personal style perfectly.
Now it is your turn to get creative! Grab your awl, pick out your favorite yarn colors, and start crafting your dream shoes today. Happy crocheting, and enjoy turning heads at the beach all summer long!
Pattern Shop
Best selling products
-

Crochet Pattern top
$4.00 -

Wanderer Crochet Bikini Pattern
$7.50 -

Pandawa Crochet Bikini Pattern
$7.50 -

Crochet Lycra Bikini Pattern
$7.50 -

Crochet One Piece Pattern
$8.00