If you have a small swimwear line and wonder how can you see that print you love on the style of bikini or onepiece you want to produce, here are a few steps of how to do it on Photoshop in a very simple way.
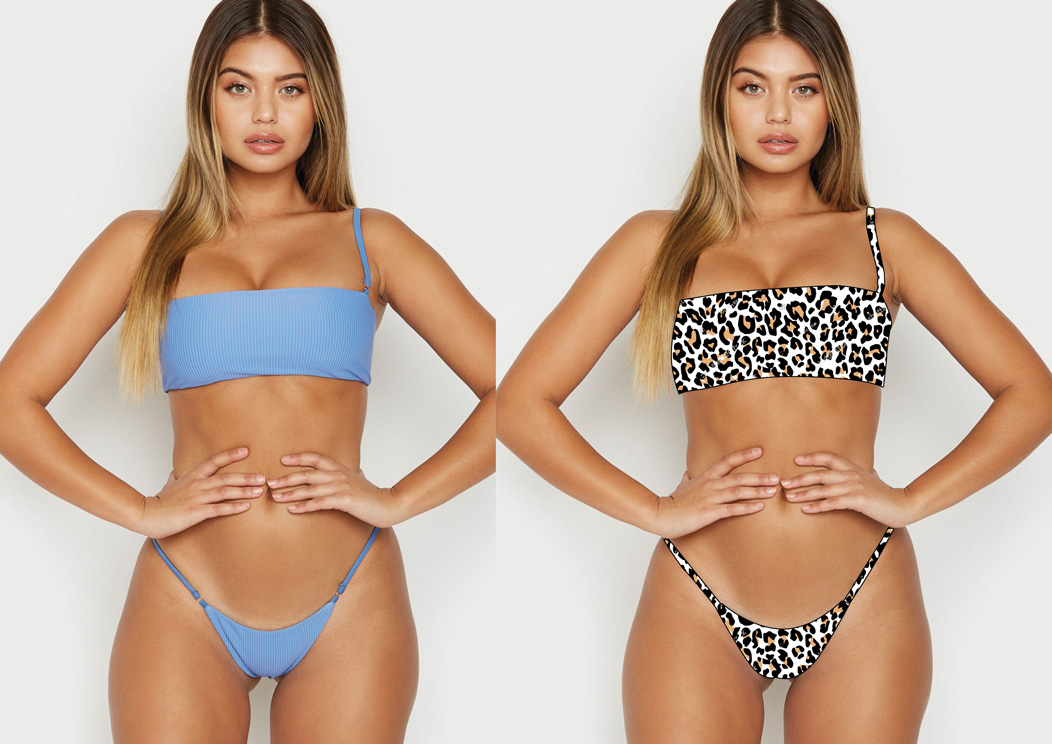
Having a preview of the print you want on a bikini is very important so you have an idea of how your finished product will look like before you produce it. It will also help the factory you choose to have a look at your design and not make any mistakes on the final product and production.
Most factories will sample your biquini design in a solid color before they sublimate your print on the lycra, and only make a small print preview of your chosen print for you to check the drawing sizes. So you won’t be able to see how the print will look like on your bikini design.
By drawing your design and applying your print on photoshop you will be able to see a preview of your loved design before it goes to the production line.

Photoshop Steps:
Open a new file with paper size International paper A4 with 29.7 cm of width by 21 cm of height and 150 px resolution.
Look online for an image similar to your desired bikini style, where the model appears front flat on the photo, it will be easier to draw the lines this way.
Many bikini factories work with shutterstock, so search for a pattern you like on this website and save it to your computer.
Once both images are saved:
1 – select Image / Place image on photoshop, and place the image with the bikini in one layer and the image with the pattern in another layer. From the menu Layer / Duplicate Layer and duplicate only the layer containing the print. You will need for the top and the bottom, they will be in separate layers.
2 – Start with the bottom of your bikini, select the layer with the model and on the top left of screen select Show Transformation Controls to make the image bigger so its easy to draw the bikini.
3 – with the Pen tool or (P) start drawing your Path on top of the bottom, don’t worry of making it perfect now, you can fix it with the Selection Tool or (A) .
4 – Once you finish your path make sure you close the last point with the first one
5 – Select the layer with the print. Move the print to the top of the bottom you just drew
6 – From menu select Layer / Vector Mask / Current Path and magic, your pattern is replaced for the one of the model image.
If you need to resize the print, go on the layers panel , on the print layer click on the link icon before you resize it , otherwise the whole bottom will be resized.
Repeat from step 3 drawing on top of your bikini top.